Since I bought my lovely HTC Hero in aid of Children in Need from Rory Cellan-Jones (the BBC tech correspondent), I have been getting very excited at the prospect of taking part in some Android development.
As I got my environment set up on my MacBook Pro (with help from O’Reilly), I thought I would make a few notes to help any others doing the same.
 </a>
</a>
Get Eclipse
Android applications are written in Java and therefore Eclipse is my IDE of choice. So, the first step is to download and install Eclipse, if you don’t have it already.
Get the Android SDK
Download the Mac OS X version of the Android SDK, and unzip to where you would like to install it. This package no longer ships with the full SDK, only its tools. One of these being the Android SDK manager, which we use to download the SDK in full. Open this by running the tools/Android script.
Depending on your personal preference, you can add these tools to your path by editing your .bash_profile and adding the location to your PATH. If there is already a PATH entry, add the location of the tools directory to it, else:
export PATH=${PATH}:/full_path_to_sdk_directory/toolsIn the Android SDK and AVD Manager, under the Installed Packages section, it should show you where your SDK is located.
We can now update the installed packages to their latest versions. When I did this I got the following error:
“Failed to fetch URL https://dl-ssl.google.com/android/repository/repository.xml, reason: HTTPS SSL error. “
If you get the same, go to the settings tab and tick the “Force https://… sources to be fetched using http://…” box and try again.
If successful, you will get a list of package updates. The latest version for me was Android 2.1_r1. I installed all available versions so that when I am developing, unless I need a feature that only the later versions allow, I can ensure compatibility with older versions.
You will also be installing “Android + Google APIs”, and the Android Documentation.
Make your Android Virtual Device
Now, you are ready to create a new Android Virtual Device (AVD) to run your code on. If I go to Settings -> About Phone on my HTC Hero, I can see that the firmware version is Android 1.5. So I’m going to create an identical AVD.
To do this, go to Virtual Devices and click New. Now you get to name your device, what version of firmware it has, and what its hardware specifications are.
Once you have created, you can start it and the virtual phone will appear on the screen. The OS will boot and then you will be able to manoeuvre around the screens and menus with your mouse and keyboard, how exciting!
App Time
To ready Eclipse we need to install the Android Development Tool plug-in.
To do this go to Help -> Install New Software -> Add Site -> and add https://dl-ssl.google.com/android/eclipse.
The plug-in is unsigned, so you will need to accept the warning message.
Ensure that you have all open projects saved and then restart eclipse.
Once you have restarted, you need to tell Eclipse where the SDK is located. Go to Eclipse -> Preferences - > Android and then browse to the SDK folder and apply.
For my very first app, I thought “HelloWorld” would be sufficient.
Time to create a new Android Project, choosing the Project Name, Android Build Target, Application Name, Package Name and name for your Activity.
Once created, I actually came across these Eclipse errors:
- Project “HelloWorld” is missing required source folder: ‘gen’
- The project could not be built until build path errors are resolved.
This appears to just be something peculiar with Eclipse and the auto-generated files. Simply edit one of the files (e.g. extra line in src/package_name/activity_name.java), save, and the errors will disappear.
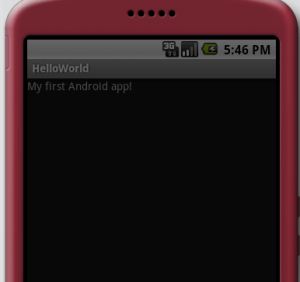
Eclipse and the Android SDK have done a lot of the work for us at this stage! Just to understand a little bit of what is going on, I’m going to edit the text which will be displayed on the main screen.
If you look at the xml file res/layout/main.xml, you will be able to see a TextView object, with the following attribute <pre lang="text">android:text=”@string/hello”</pre>. This refers to a string in the res/values/strings.xml file. In this file, I changed the hello string to “My first Android app!”.
Save, build, run and ta-dah!
Woo, first app done.